A soft chocolate sponge topped with a light, silky milk chocolate mousse. This is the cake I make when I want something that looks like it came from a bakery but is really just a few simple stages done one at a time.
I used to think mousse cakes were out of my league until I broke this one down into pieces. Bake a sponge. Make a mousse. Assemble and chill. None of it is hard, it just takes a little patience while things set.
The milk chocolate mousse is the star here. It’s softer and sweeter than a dark chocolate mousse, with a texture that’s closer to whipped cream than pudding. A touch of gelatin gives it enough structure to hold its shape once sliced.
I like building this in a springform pan lined with acetate or parchment along the sides, since it makes the mousse layer easy to release with clean edges once it’s fully set.
Give yourself an evening for this one, mostly because of the chill time. The actual hands-on work is pretty quick, and the result feels a lot more impressive than the effort it takes.
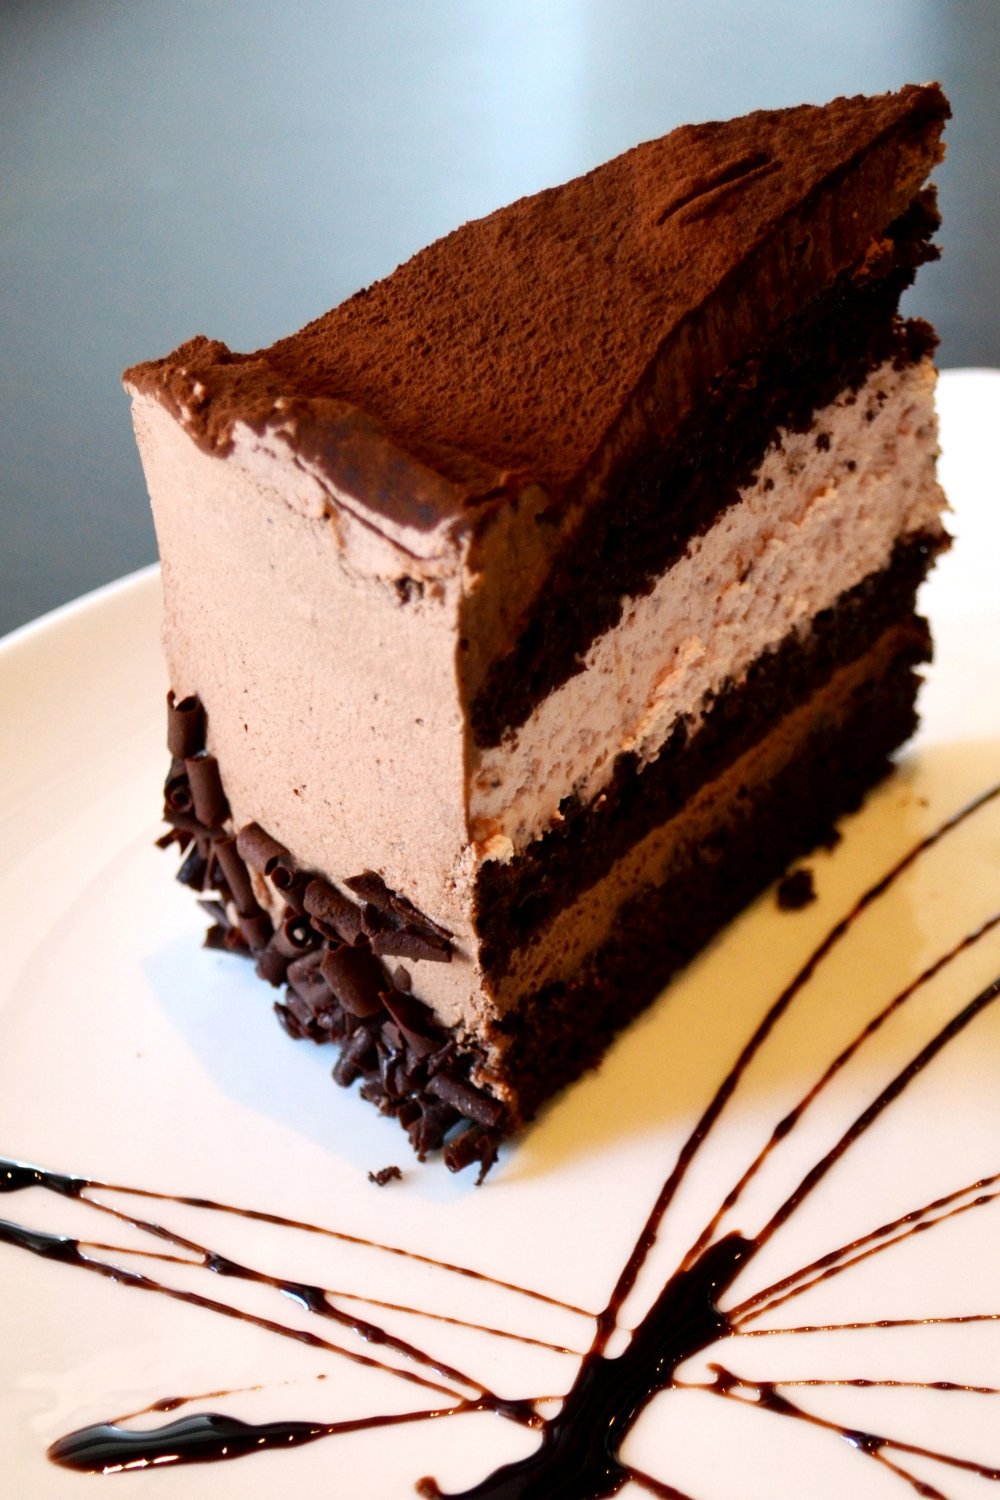
A soft chocolate sponge topped with a light, silky milk chocolate mousse.
Why This Milk Chocolate Mousse Cake Works
- The sponge and mousse are made separately, so each step stays simple.
- A small amount of gelatin gives the mousse just enough structure to slice cleanly.
- Milk chocolate keeps the mousse sweet and light instead of intensely bitter.
- Lining the pan with acetate or parchment gives the finished cake clean, bakery-style edges.
- Most of the time is hands-off chilling, so it’s easier than it looks.
Ingredient Notes for This Chocolate Mousse Cake
- Milk chocolate – Use a good quality baking or eating chocolate rather than chocolate chips, which don’t melt as smoothly.
- Gelatin – Powdered gelatin bloomed in cold water works well, or use sheet gelatin soaked in ice water if that’s what you have on hand.
- Heavy cream – Use cream with at least 35% fat so it whips up light and holds air well in the mousse.
- Cocoa powder – This goes into the sponge for a deep chocolate flavor and color.
- Egg yolks – These help thicken the base the milk chocolate is blended into, giving the mousse a smoother texture.
Full Ingredients List for Milk Chocolate Mousse Cake
For the chocolate sponge:
- 3 large eggs
- 3/4 cup granulated sugar
- 1/2 cup all-purpose flour
- 1/4 cup cocoa powder
- 1/4 cup vegetable oil
- 1/4 cup whole milk
For the milk chocolate mousse:
- 2 teaspoons powdered gelatin
- 2 tablespoons cold water
- 10 oz milk chocolate, finely chopped
- 3/4 cup whole milk
- 2 egg yolks
- 2 tablespoons granulated sugar
- 1 3/4 cups heavy cream, cold
A digital thermometer takes the guesswork out of the mousse base, so I always keep one clipped to the side of my saucepan for recipes like this.
Shop My Favorite Digital Thermometer
How to Make Milk Chocolate Mousse Cake
Step 1: Bake the Chocolate Sponge
- Preheat the oven to 350°F and line a round cake pan with parchment paper.
- Whisk the eggs and sugar together until pale and slightly thickened.
- Sift in the flour and cocoa powder, folding gently to combine.
- Stir in the oil and milk until just combined.
- Pour into the pan and bake for 20 to 25 minutes, until a toothpick comes out clean.
- Let the sponge cool completely, then trim it to fit inside a springform pan.
Tip: Fold the dry ingredients in gently so the sponge stays light instead of dense.
Step 2: Make the Mousse Base
- Sprinkle the gelatin over the cold water and let it sit for 10 minutes to bloom.
- Place the chopped milk chocolate in a heatproof bowl.
- In a saucepan, whisk the milk, egg yolks, and sugar together over medium heat until it thickens slightly and coats the back of a spoon.
- Remove from the heat and whisk in the bloomed gelatin until dissolved.
- Pour the hot mixture over the chopped chocolate and let it sit for 2 minutes, then whisk until smooth.
- Let this chocolate base cool to room temperature.
Tip: The mixture should be warm but not hot when you fold in the whipped cream, or it can deflate.
Step 3: Fold, Assemble, and Chill
- Whip the cold heavy cream to soft peaks.
- Fold the whipped cream into the cooled chocolate base in three additions, until smooth and no streaks remain.
- Place the trimmed sponge into a springform pan lined with parchment or acetate along the sides.
- Pour the mousse over the sponge and smooth the top with a spatula.
- Refrigerate for at least 6 hours, or overnight, until fully set.
- Release the sides of the pan and carefully remove the lining before slicing.
Milk Chocolate Mousse Cake
A soft chocolate sponge topped with a light, silky milk chocolate mousse, chilled until perfectly set.
Ingredients
Chocolate Sponge
- 3 large eggs
- 3/4 cup granulated sugar
- 1/2 cup all-purpose flour
- 1/4 cup cocoa powder
- 1/4 cup vegetable oil
- 1/4 cup whole milk
Milk Chocolate Mousse
- 2 teaspoons powdered gelatin
- 2 tablespoons cold water
- 10 oz milk chocolate, finely chopped
- 3/4 cup whole milk
- 2 egg yolks
- 2 tablespoons granulated sugar
- 1 3/4 cups heavy cream, cold
Instructions
- Bake the chocolate sponge: whisk the eggs and sugar, fold in the flour and cocoa, stir in the oil and milk, then bake at 350°F for 20 to 25 minutes. Cool completely.
- Bloom the gelatin in cold water for 10 minutes.
- Whisk the milk, egg yolks, and sugar over medium heat until slightly thickened, then whisk in the gelatin.
- Pour over the chopped chocolate, let sit 2 minutes, then whisk smooth. Cool to room temperature.
- Whip the cream to soft peaks and fold into the chocolate base in three additions.
- Place the trimmed sponge in a lined springform pan and pour the mousse on top.
- Chill for at least 6 hours, then release the pan and slice.
Notes
- Store covered in the fridge for up to 3 days.
- Line the pan sides with acetate or parchment for the cleanest release.
- Let the cake sit at room temperature for 15 minutes before slicing for the smoothest cut.
Nutrition (per slice, estimated)
- Calories390
- Total Fat27g
- Saturated Fat15g
- Cholesterol120mg
- Sodium55mg
- Total Carbs31g
- Dietary Fiber1.5g
- Sugars25g
- Protein6g
- Calcium90mg
- Iron1.5mg
- Potassium210mg
Nutrition values are estimates only and will vary based on the exact brands used.
Serving Ideas and Variations
- Top with chocolate shavings or a dusting of cocoa powder right before serving.
- Swap the milk chocolate for dark chocolate if you prefer a more intense flavor.
- Serve with a small pitcher of warm chocolate sauce on the side for extra decadence.
Tips for Success
- Let the chocolate base cool to room temperature before folding in the whipped cream, or the mousse can turn grainy.
- Fold gently rather than stirring so the mousse stays light and airy.
- Use a warm, dry knife for slicing, wiping it clean between each cut.
- Trim the sponge slightly smaller than the pan so the mousse can flow evenly around the edges.
- Don’t rush the chill time. The mousse needs the full time to set properly for clean slices.
Notes and Frequently Asked Questions
- Can I make this cake a day ahead? Yes, it actually slices more cleanly after a full day in the fridge.
- How do I store leftovers? Keep it covered in the refrigerator and enjoy within 3 days.
- Can I freeze this cake? Yes, wrap slices tightly and freeze for up to 1 month, then thaw in the fridge overnight.
- What can I use instead of gelatin? Gelatin is what gives the mousse its sliceable structure, so it’s best not to skip it.
- What’s a common mistake to avoid? Folding the whipped cream into a chocolate base that’s still warm, which can deflate the mousse.
A Few Final Thoughts
This cake looks far more complicated than it actually is once you break it into stages.
The soft sponge and light mousse together make for a dessert that feels special without demanding advanced skills.
I hope it becomes your new go-to for birthdays and celebrations.
If you give this milk chocolate mousse cake a try, I’d love to hear how it turned out in the comments below.

Hi, I’m Jessica! I bake and share simple, cozy recipes here on CookieRecipesOnline.com. Thanks for stopping by my kitchen.